Lately I have been doing some research on the Paleo diet and lifestyle. I try to maintain a healthy lifestyle most of the time and I am always interested in new research and ideas on the subjects of nutrition and diet. Since Paleo seems to be more than a fad, I thought it might be worth learning about. I find the idea that we shouldn’t eat things just because our ancestors didn’t eat them 10,000 years ago less than a convincing argument, but there seems to be another side of Paleo that is routed in science.
I have yet to make up my mind if I am going to try Paleo out, but it has gotten me to explore some paleo-friendly recipes. One of the ideas I came across (after the world famous cauliflower pizza crust) was an alternative piecrust for quiche. Of course the easiest way to cut the carbs from your quiche is to skip the curst, but I always find that leaves me a bit hungry. So, a sweet potato crust is the perfect solution.
I will warn you that this recipe does take some time because the sweet potatoes have to be drained of their excess water. But if you don’t mind the extra effort it makes a great crust!
Recipe adapted from Two of a Kind Cooks
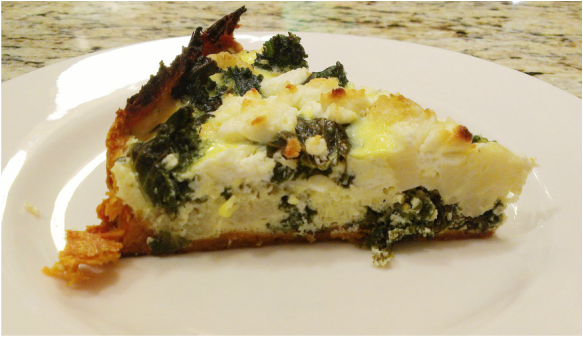
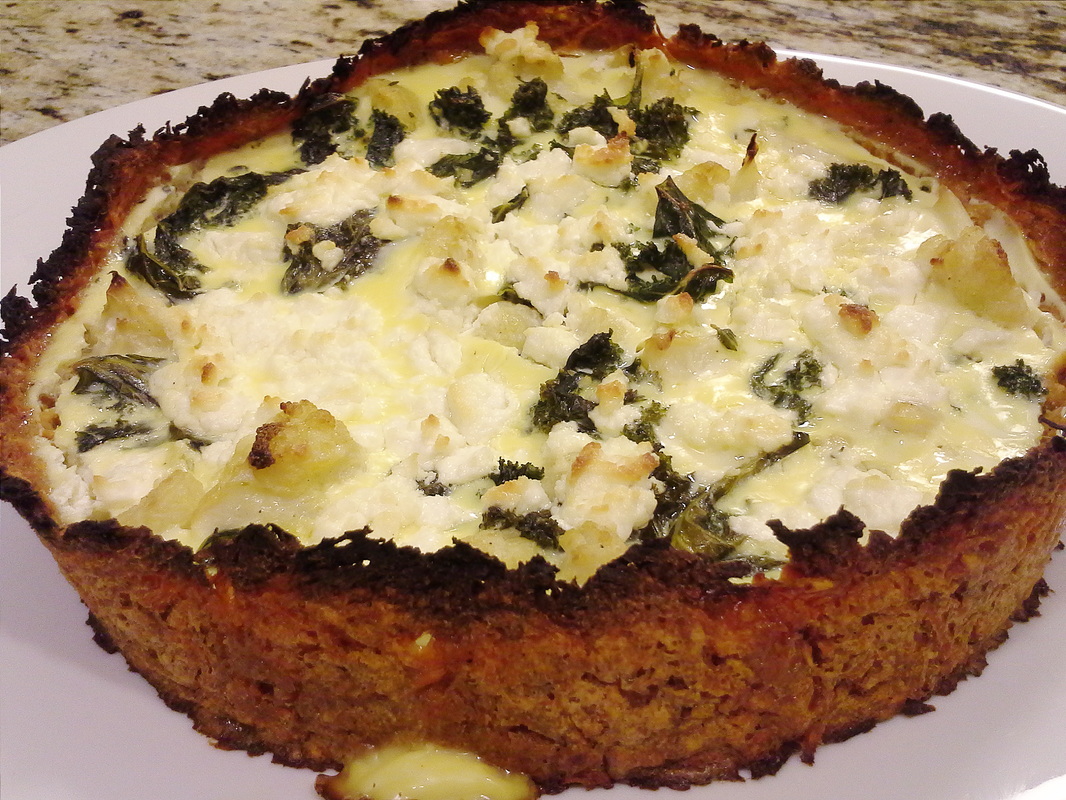
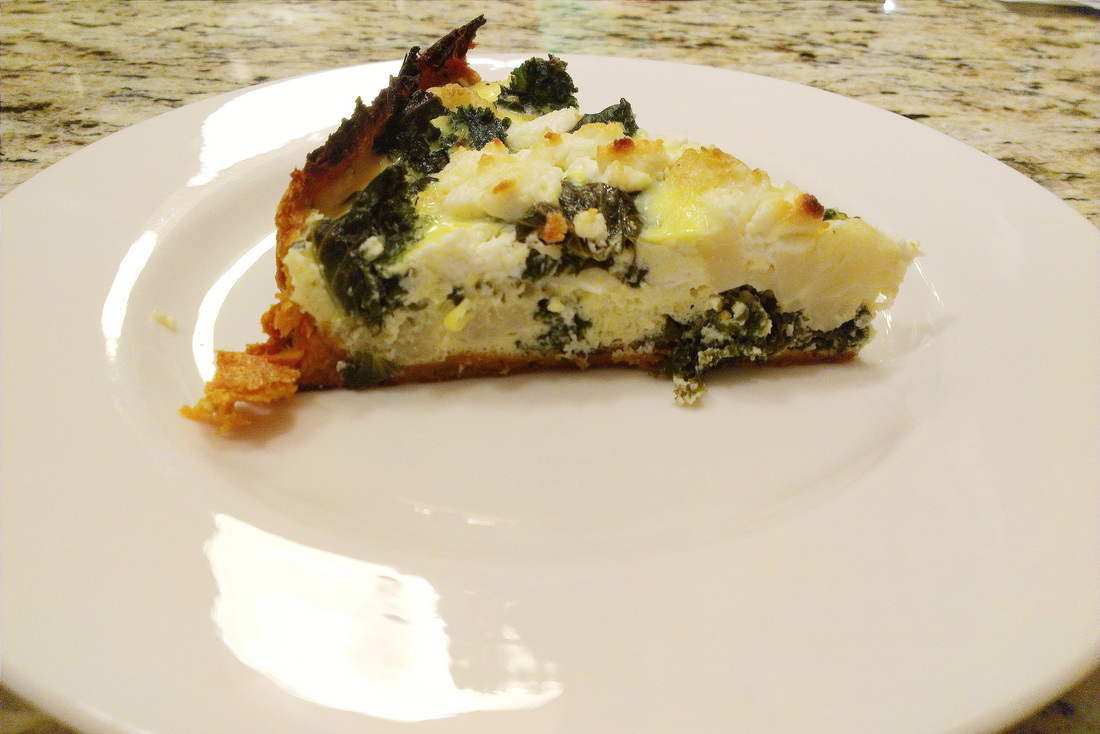
Kale & Cauliflower Quiche with a Sweet Potato Crust
Makes 1 9” quiche
Ingredients:
Crust:
3 c. peeled and grated sweet potatoes
1 tsp. sea salt
3 tbsp. whole wheat flour
1 egg
¼ tsp. black pepper
Filling:
½ head of cauliflower
2 tbs. olive oil
Salt & pepper to taste
3 c. torn kale leaves (no stems)
½ c. full fat plain yogurt
3 eggs
1 clove garlic, crushed
1 tsp. ground Dijon mustard
1 tbsp. fresh thyme, minced
1 tsp. sea salt
2 ½ -3 ounces goat cheese
Directions:
Crust:
1. Preheat the oven to 375 degrees and grease a 9” spring form pan.*
2. Place the grated sweet potato in a cone shaped strainer over a bowl and sprinkle with the salt. Let them sit for about 10 minutes.**
3. Now use the pestle to press the water out of the sweet potato. This will take some time and hard work, but try to get as much of the water out as possible.
4. In a medium bowl whisk the egg.
5. Add the sweet potato to the bowl with the egg and mix together.
6. Add the flour and pepper and mix thoroughly.
7. Press the mixture into the greased pan along the bottom and sides.
8. Pre-bake the crust for 20-25 minutes.
Notes:
*I used a spring form pan because I was worried the sweet potato crust would stick badly. It ended up pulling away from the sides of the pan when I pre-baked it and was easy to remove from the pan.
**Straining the water from the sweet potato is much easier if you have a cone shaped strainer with a pestle. If you do not use a colander and a potato masher to do the same thing.
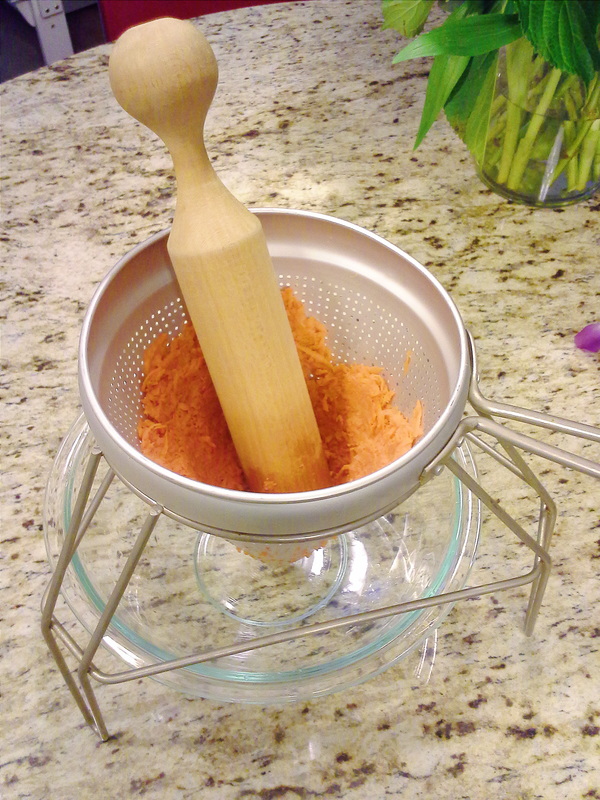
Use a cone shaped strainer and pestle to remove excess water from the sweet potato.
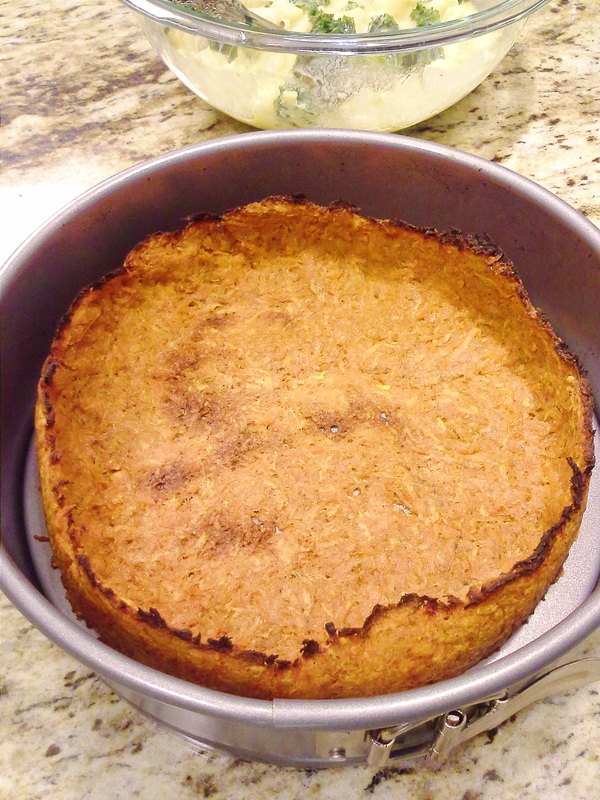
Pre-baked crust.
Filling:
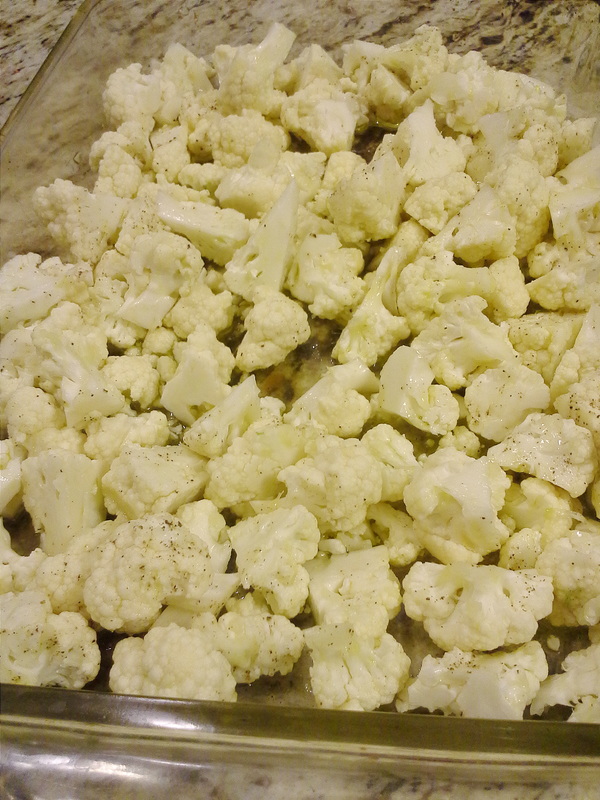
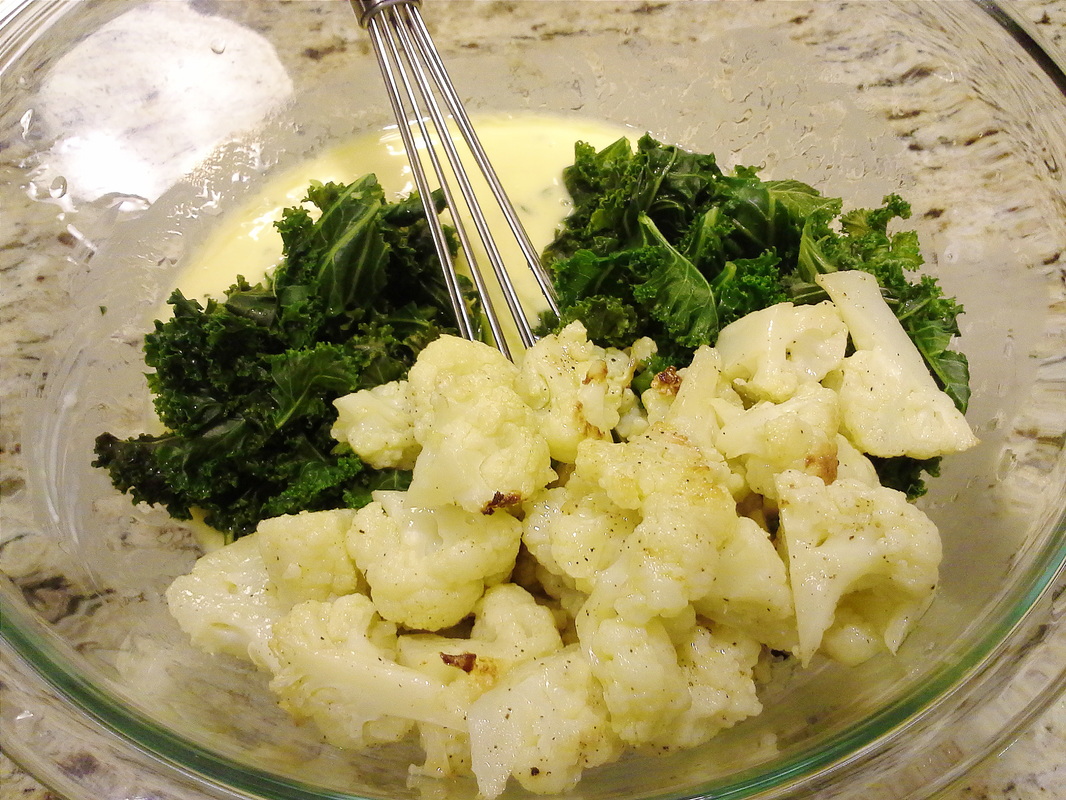
1. Cut the cauliflower into bite size flowerets and place in a roasting pan.
2. Add olive oil, salt, and pepper and toss.
3. Bake for 20-25 minutes or until tender. Then set aside.
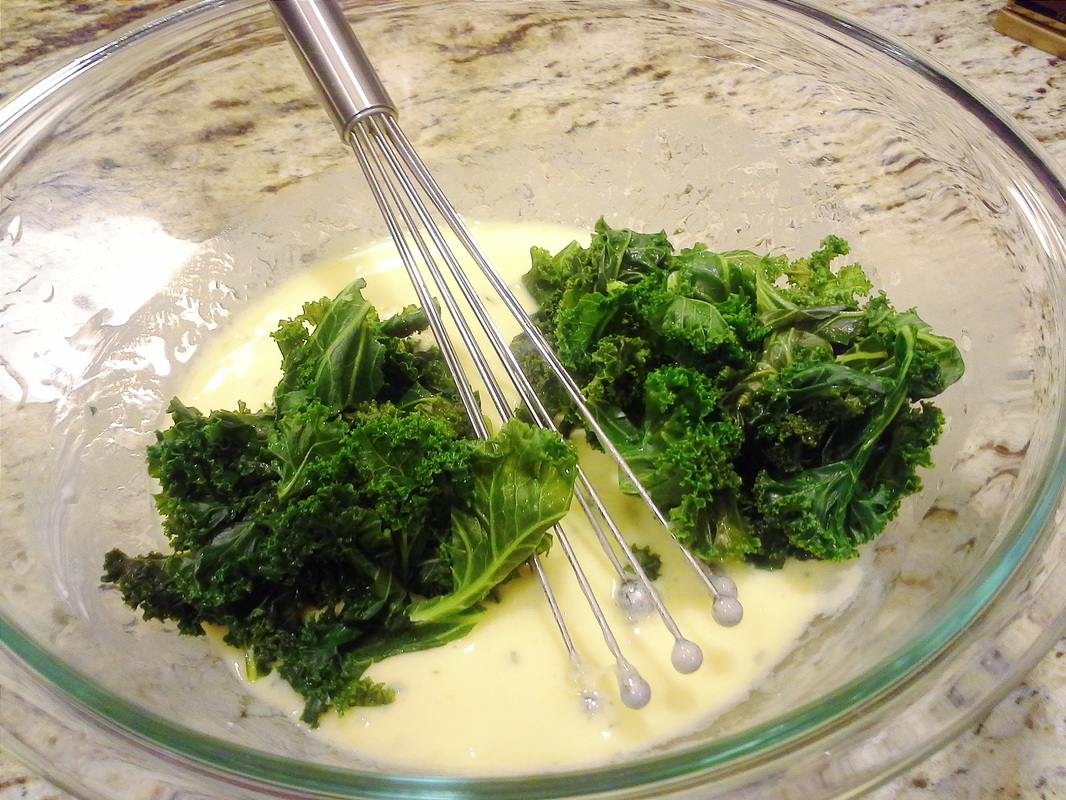
4. Steam the kale and set aside.
5. In a large bowl whisk the eggs and add the garlic, mustard, thyme, and salt.
6. Stir in the kale and cauliflower.
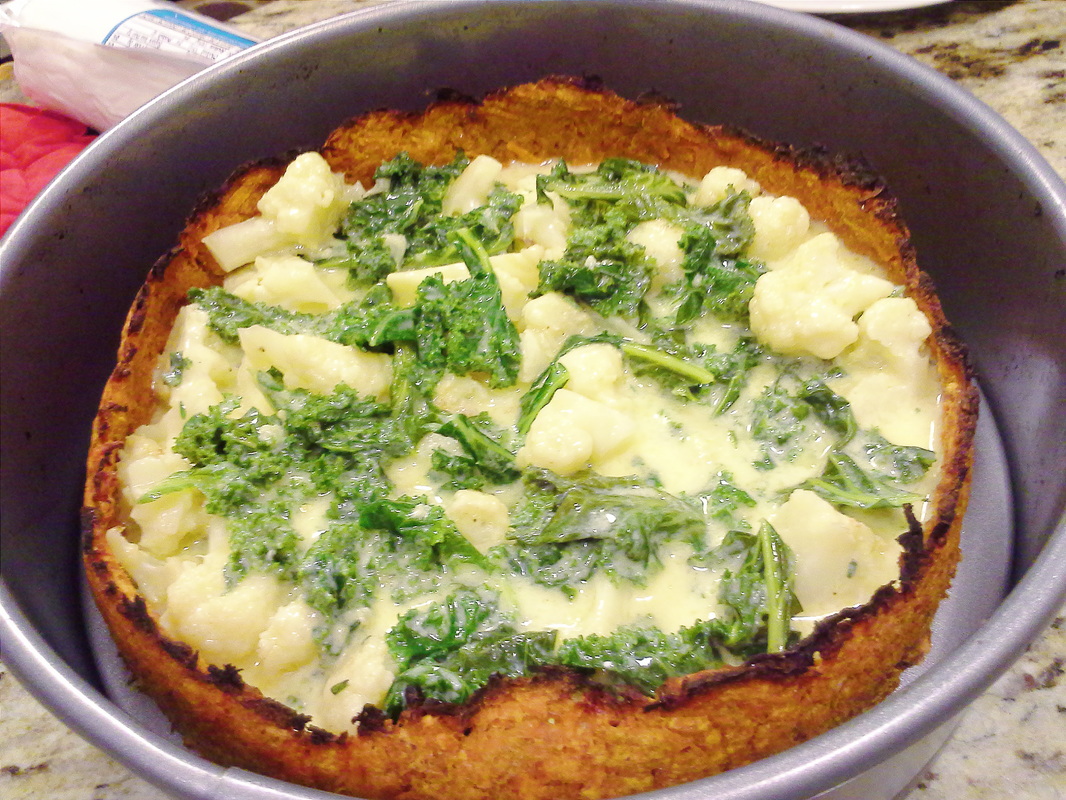
7. Spoon the mixture into the crust.
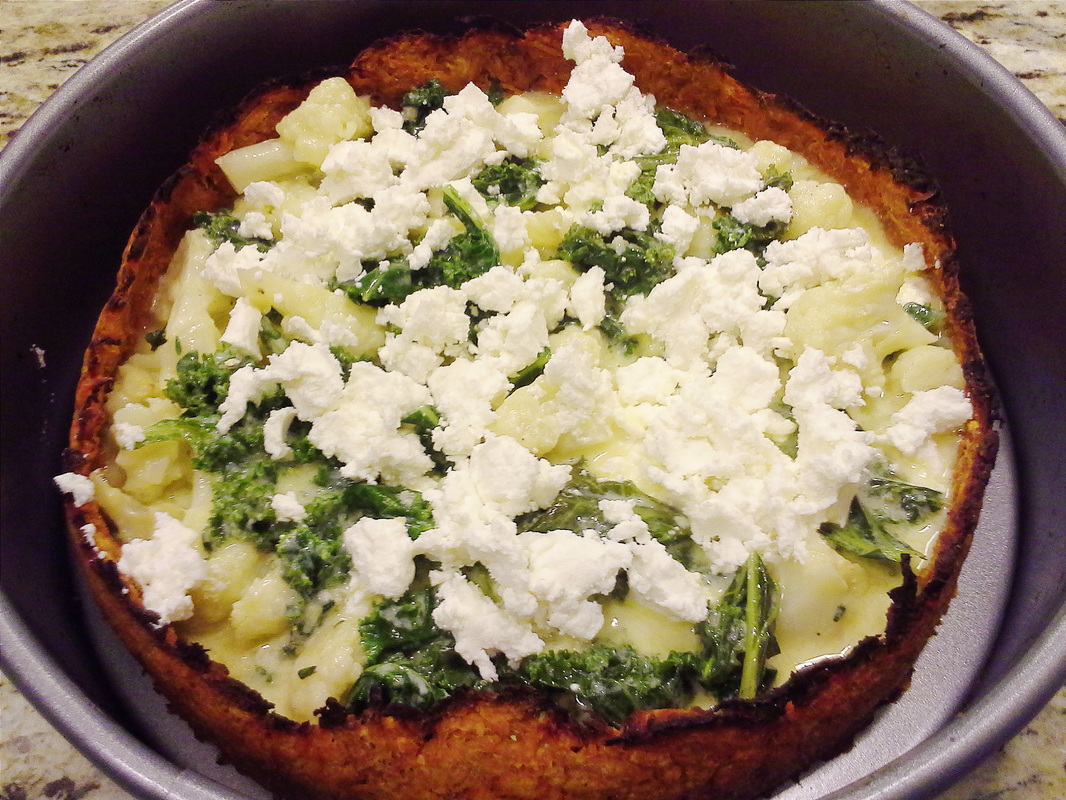
8. Crumble the goat cheese and sprinkle on the top.
9. Bake the whole thing for 40 minutes or until the middle is done.
1. Cut the cauliflower into bite size flowerets and place in a roasting pan.
2. Add olive oil, salt, and pepper and toss.
3. Bake for 20-25 minutes or until tender. Then set aside.
4. Steam the kale and set aside.
5. In a large bowl whisk the eggs and add the garlic, mustard, thyme, and salt.
6. Stir in the kale and cauliflower.
7. Spoon the mixture into the crust.
8. Crumble the goat cheese and sprinkle on the top.
9. Bake the whole thing for 40 minutes or until the middle is done.


 RSS Feed
